

What is MEM?
Molecular Execution Machine, or MEM, is a developer platform for creating, testing and deploying serverless functions that leverage blockchain technology. It is built on top of and uses Arweave technology.
With MEM, everything operates trustlessly, allowing developers to assess the current state of contracts autonomously without relying on the network. This ensures transparency and dependability as evaluations can be conducted permissionlessly by any third party.
Key Features of MEM
Gasless Layer 2 (L2): MEM operates as a gasless Layer 2 protocol, enabling smart contracts to scale limitlessly across multiple blockchains while remaining cost-effective.
Developer-Friendly: It abstracts and simplifies complex concepts around blockchain and cryptocurrency technology, allowing developers to focus more on building their application's features and functionality.
Integration Flexibility: It serves as a hybrid solution that seamlessly integrates with both web2 and web3 applications. Contracts can be written in well-known and familiar languages.
Supported Languages: MEM supports multiple programming languages, including JavaScript, TypeScript, Rust, C/C++, AssemblyScript, Go, Zig, Solidity, and Vyper.
The Smart Contract
We're going to be working through a simple guestbook contract that takes a username and data and updates the contract state with the save function.
Here are the guidelines for creating smart contracts on MEM:
Your contract's source code should be written in one of the supported programming languages.
The contract's source code must include a function named
handle, which can be either synchronous or asynchronous, depending on your code logic.The
handlefunction must have two arguments:The
stateargument, which represents the current state of the contract.The
actionargument, which includes theinputfield holding the arguments passed during the contract interaction. Theinputfield can contain thefunctionproperty and any additional data required for the operation, depending on your contract's logic.
For error handling, you can use the following statements:
Use
throw new ContractError("ERROR_TEXT"), which is equivalent tothrow new Error("")in JavaScript.You can also use
ContractAssert(condition), which is equivalent to the "assert" statement in node:assert.
Here is the contract we will be using for this walkthrough.
export async function handle(state, action) {
    const input = action.input;

    if (input.function === "save") {
        const { username, data } = input;
        // Asserts that username and data exists
        ContractAssert(username.trim().length && data.trim().length, "ERROR_INVALID_INPUT");
        // Asserts types are strings
        ContractAssert(typeof username === "string" && typeof data === "string");
        // Updates log state with new entry
        state.logs.push ({ username, data });
        return { state }
    }
}
Initial State & Function Declaration
Every contract must be deployed with initial state. For the contract above, that state is declared as an empty array named logs. Once a post is created, it is then pushed to state (logs) and persisted to the network.
When using the MEM IDE to test smart contracts, state.json must include the initial state, along with the contract functions and their corresponding parameters. These are declared inside the publicFunctions object. The URL's at the bottom are the API endpoints used for the IDE.
For this particular contract, we add the save function to publicFunctions which takes in two arguments of username and data.
{
    "logs": [],
    "publicFunctions": {
        "save": ["username", "data"]
    },
    "evm_molecule_url": "https://api.mem.tech/api/evm",
    "evm_auth_url": "https://api.mem.tech/api/evm/auth"
}
The MEM IDE
The MEM IDE provides a straightforward way for us to test and debug smart contracts in a replicated production setting before deploying them to the network and using them in our interfaces. Using the IDE is currently free to all and utilizing it is a useful way to get familiar with the flow and syntax of MEM serverless functions and smart contracts.
Head over to the IDE here and we can get started interacting with our contract.
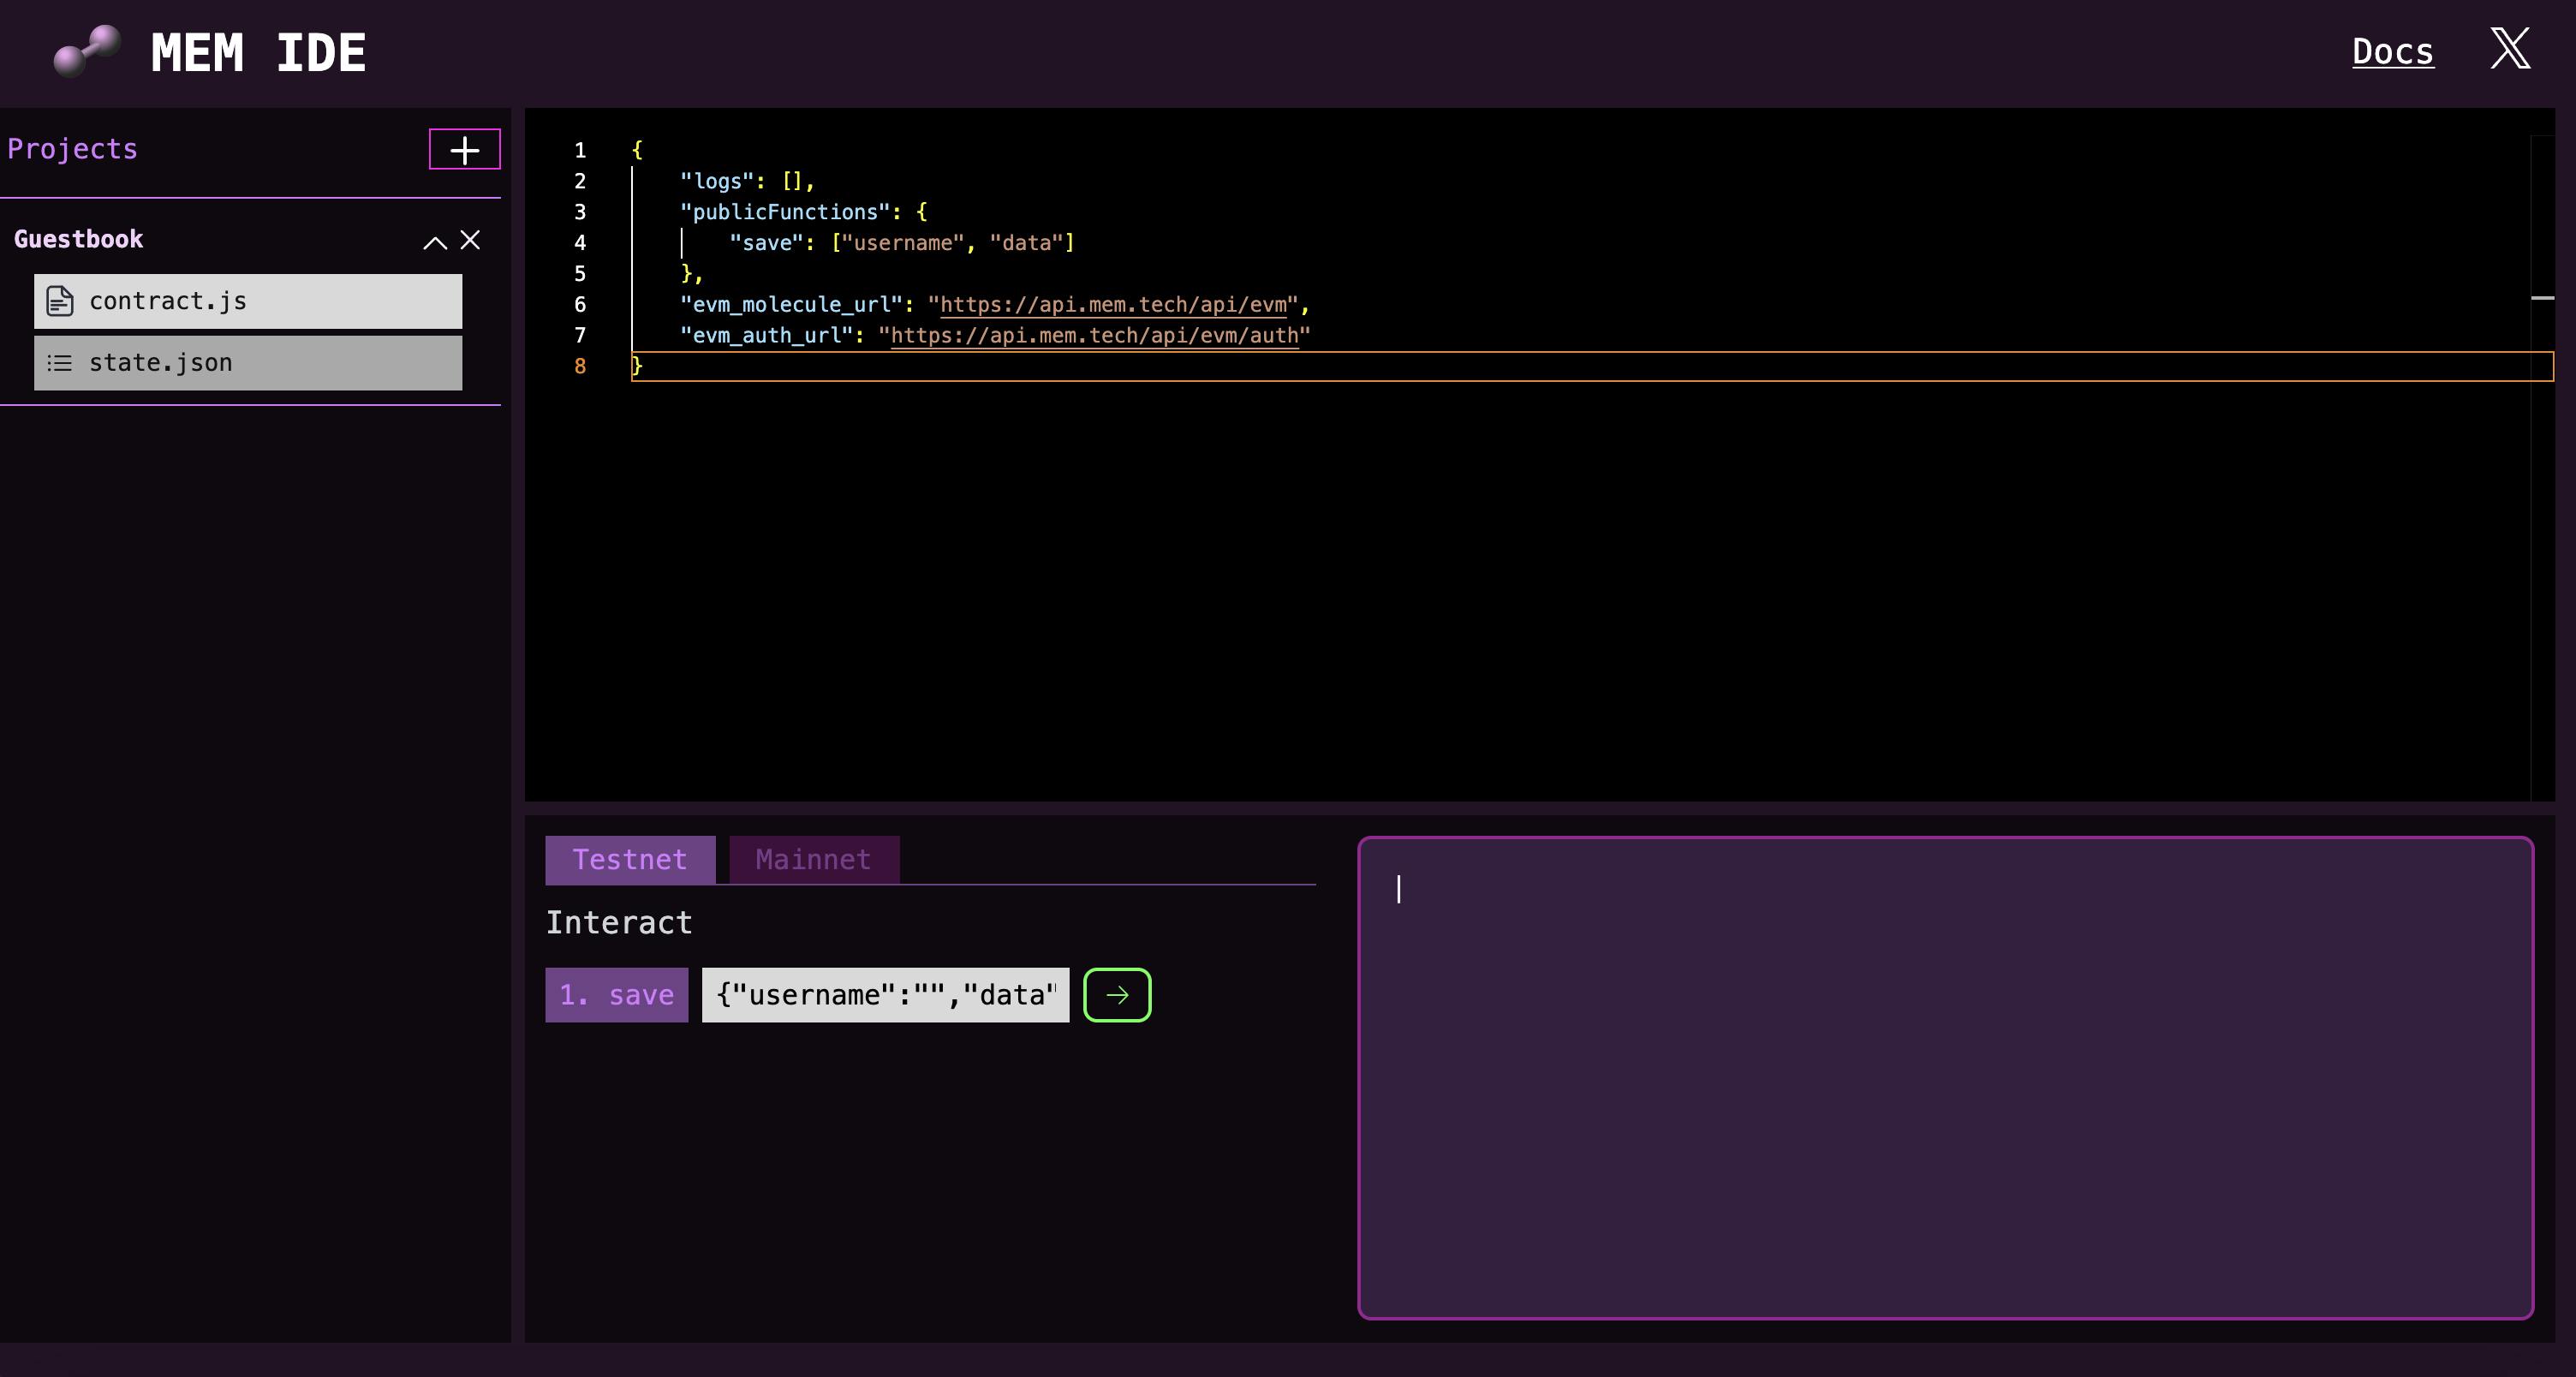
Take the contract we discussed earlier and paste it into the contract.js file in the IDE. Next, take the state from above and paste it into state.json. Now that the environment is set up, the IDE is ready to interact with the contract. You will notice in the Interact component that the inputs update dynamically. The IDE will read from publicFunctions state and automatically update the component with the corresponding inputs for the contract.
If your contract takes in different data types, you will need to update the input value to be that data type. For instance, if you are persisting a number to state, ensure that the value passed in is a number like so {"number": 50}. You can use ContractAssert
to ensure the correct data types are being passed in to your contract.
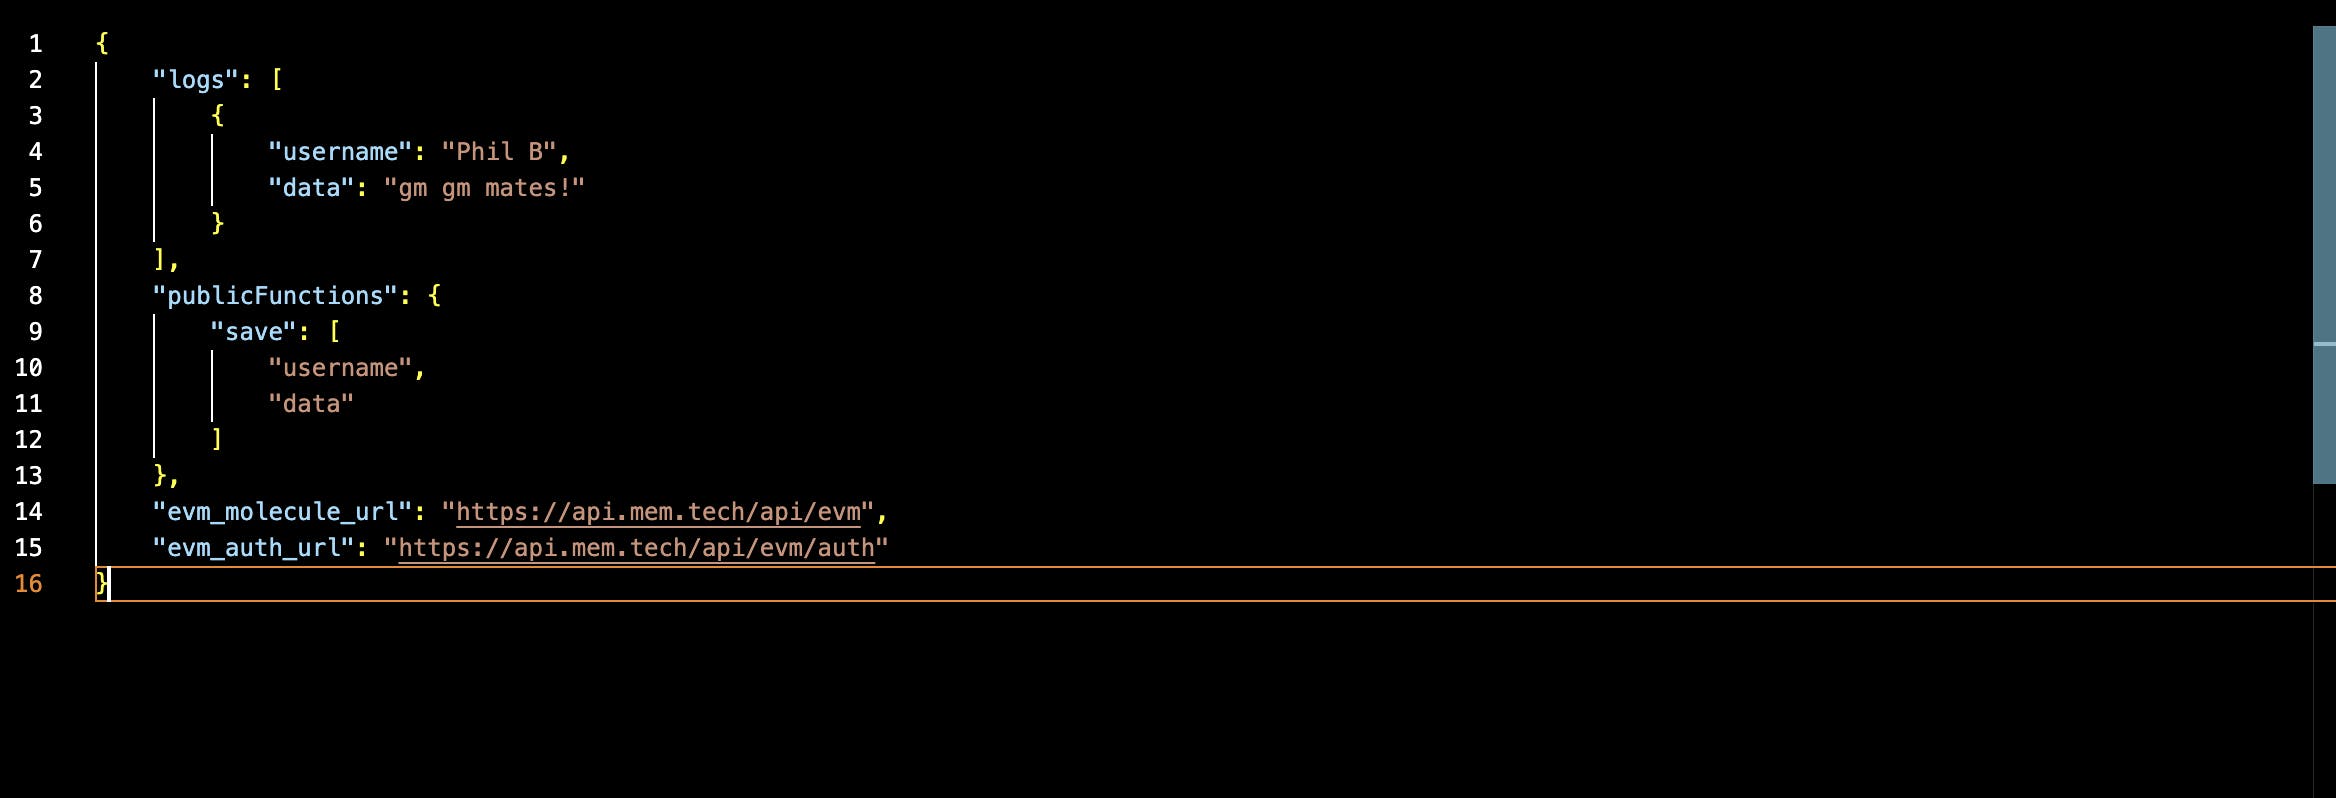
This particular contract expects these values as strings. In the input section marked save, add a username and data. Click the green arrow to run the interaction. You will notice that the logs state has been updated with your entry almost instantly.
Extending Contract Functionality
Now let's add a function to the contract that removes all entries. Paste the following line underneath the first if statement.
if (input.function === "removeEntries") {
  state.logs = []

  return { state }
}
Now in your state.json file, underneath the save function declarations, add the following "removeEntries": []. Given that the function removeEntries does not take any arguments, an empty array will be used to inform the IDE that it is a function without parameters.
You will now see a second input in the Interact component labeled removeEntries. If you click that function you should see the state of logs revert to its initial state of an empty array. In the logs component to the right of the inputs, you will a list of the contract interactions you have performed so far.
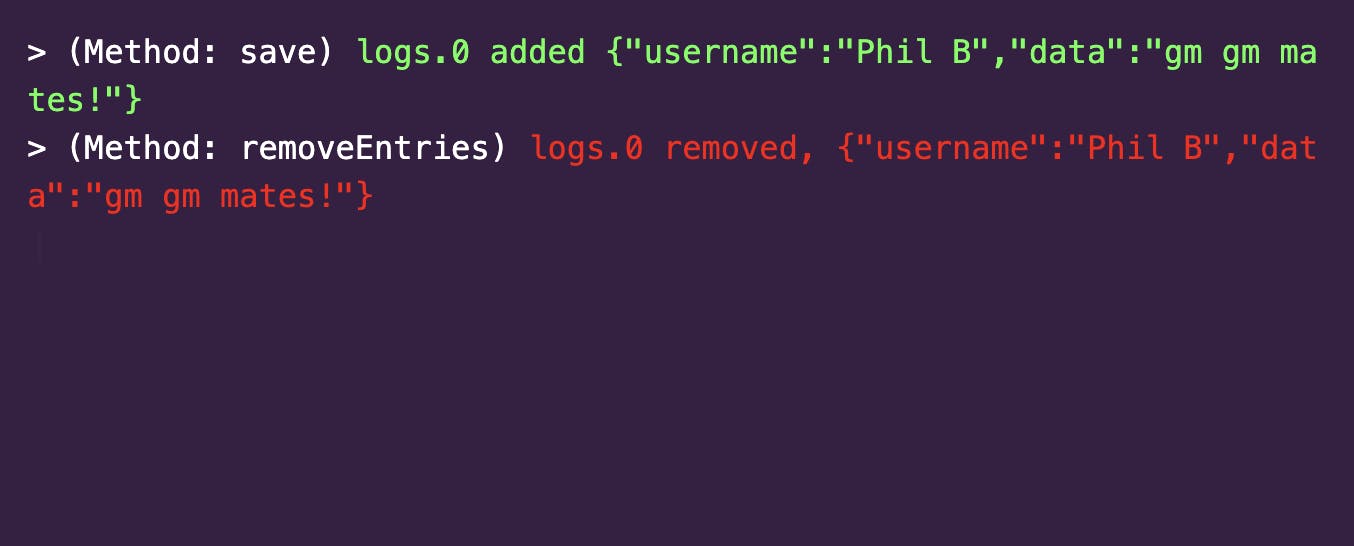
As you can see, the state handles updates smoothly, which greatly enhances the user and developer experience. This streamlined approach to managing contract state allows for efficient interactions and execution of functions, ultimately contributing to a more friendly environment.
In Conclusion
In this exploration of the Molecular Execution Machine (MEM), we've delved into its innovative approach to addressing the scalability challenges of blockchain technology. As blockchain technology continues to evolve and shape the future of the digital landscape, MEM will serve as a testament to the ongoing efforts to simplify the development process, increase scalability, and enhance the user experience. Its ability to bridge the gap between traditional web2 applications and the decentralized web3 world opens up new possibilities for developers and users alike.
I encourage developers to experiment with its capabilities through the MEM IDE, and consider how it can be integrated into their projects. The potential for creating efficient and scalable decentralized applications is now more accessible than ever before.
The world of blockchain technology is ever-changing, and MEM represents another step forward in unlocking its full potential.
Get Started with MEM