


Introduction
At its core, Arweave is a protocol for storing decentralized files across a distributed network of computers. It is queryable and exposes its data via a GraphQL API to anyone who wants to use it, permissionlessly, giving us access to each Arweave node on the network. Using GraphQL gives us flexability with our queries, enhancing the developer experience. Pair this with the arweave-js SDK and ArConnect and we have the ability to create unique interfaces using those flexible queries to interact with the network.
This is a basic walkthrough on how GraphQL and Arweave interact. We will build an interface where we will use our wallets from ArConnect to query and return incoming and outgoing transaction data.
arweave-js
arweave-js is the JavaScript/TypeScript SDK for interacting with the Arweave network. For this build, we will be using the SDK for connecting to a gateway, leveraging the API, and interacting with our wallets.
There are other capabilities that arweave-js makes available to us including:
- create a web wallet.
- get transaction data.
- query by contract, tags, and other metadata.
- create wallet to wallet transactions.
- sign transactions.
- get block data.
GraphQL
GraphQL is a query language and server-side runtime for APIs. It is used to load specified data from a server to a client, returning only the required data. This gives us flexibility with API calls, an easy interface to work with, and less over and under-fetching data. Traditionally web applications used REST APIs but since the release and adoption of GraphQL, more and more web applications are using this query language.
ArConnect web wallet
ArConnect is a web wallet extension for managing your Arweave assets. We use this for authorizing and tracking transactions and permissions without exposing private keys. We will be using this for this walkthrough. You can get one here.
To create a wallet with some $AR funds to test the SDK or interact with the Arweave network, you can create a wallet and load it with some test $AR from the faucet here. Once this is created and the wallet JSON file is saved to your local machine, you can import it into your ArConnect wallet. Other ways to acquire $AR here.
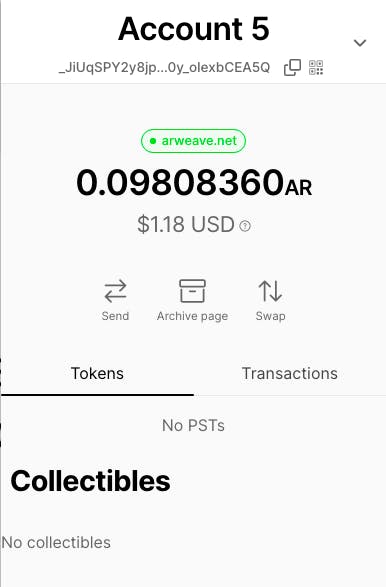
Once you've created a password for ArConnect, you can either load your wallet, or create an empty wallet. To do this open the extension and in the top right hand corner click the arrow, then the plus symbol. Here you can load a wallet or add a wallet. Adding will generate a new wallet and allow you to save it. Having multiple wallets is useful while developing and testing on the Arweave network for debugging, error handling and more.
Getting Started
For this build, we are creating a React application that will interact with wallets loaded into ArConnect. Once we have our browser extension and wallet/s set up, we create our application and install the dependencies needed. For this build we are using node 16 so double check your version.
We want to go to our terminal and run npx create-react-app APP_NAME, then cd APP_NAME and open the directory in your editor. You can name your app whatever you choose. We then install the arweave-js dependency by running yarn add arweave in our terminal.
Our work will be done in App.js and the api/queries.js files which you can view here. Let's start with App.js and explain how it all connects.
Click to view code
import './App.css';
import { useState } from 'react';
import Arweave from 'arweave';
import { recipientQuery, ownersQuery } from './api/queries';

function App() {
  const arweave = Arweave.init({
    host: 'arweave.net',
    port: 443,
    protocol: 'https'
  });

  const [wallets, setWallets] = useState([]);
  const [recipientTxns, setRecipientTxns] = useState();
  const [ownersTxns, setOwnersTxns] = useState();
  const [currentAddress, setCurrentAddress] = useState();

  const [error, setError] = useState();
  const [isLoading, setIsLoading] = useState(false);

  const connect = async () => {
    setIsLoading(true);
    try {
      await window.arweaveWallet.connect("ACCESS_ALL_ADDRESSES");
    }
    catch (error) {
      setError(`${error.message}. Refresh to try again.`);
    }
    const addresses = await window.arweaveWallet.getAllAddresses();
    setWallets(addresses);
    setIsLoading(false);
  }

  const handleChange = async (e) => {
    const address = e.target.value;
    setCurrentAddress(address);
  }

  const handleQuery = async (condition) => {
    setIsLoading(true);
    const isRecipient = condition === "recipient";
    const queryFunc = isRecipient ? recipientQuery : ownersQuery;
    setOwnersTxns();
    setRecipientTxns();
    try {
      const query = queryFunc(currentAddress);
      const results = await arweave.api.post(`graphql`, query)
        .catch(err => {
          console.error('GraphQL query failed');
          throw new Error(err);
        });
      const edges = results.data.data.transactions.edges;
      isRecipient ? setRecipientTxns(edges) : setOwnersTxns(edges);
      setIsLoading(false)
    }
    catch (error) {
      console.log(error);
    }
  }

  return (
    <div className="App">
      {!!wallets.length &&
        <div>
          <select style={{ width: "25rem", margin: "15px" }} onChange={(e) => handleChange(e)}>
            <option style={{ textAlign: "center" }} disabled>{wallets.length ? "-- select wallet --" : "loading..."}</option>
            {wallets && wallets.map(address => {
              return <option value={address}>{address}</option>
            })}
          </select>
          <button onClick={() => handleQuery("recipient")}>get incoming txns</button>
          <button onClick={() => handleQuery("owners")}>get outgoing txns</button>
        </div>
      }
      {(!wallets.length && !isLoading) && <button style={{ marginTop: "1rem" }} onClick={() => connect()}>Connect</button>}

      <div style={{ display: "block" }}>{error && <p style={{ color: "red" }}>{error}</p>}</div>
      <div style={containerStyle}>
        {isLoading && <p style={{ textAlign: "center" }}>...loading</p>}
        {recipientTxns && (
          (<div>
            <h3>Recipient Transactions</h3>
            {recipientTxns.map(txn => {
              return (
                <div style={txnStyle}>
                  <p><strong>Receiver:</strong> {txn.node.owner.address}</p>
                  <p><strong>Amount:</strong> {txn.node.quantity.ar} $AR</p>
                  <p><strong>Fee:</strong> {txn.node.fee.ar} $AR</p>
                  {txn.node.tags.length && <p><strong>Tags:</strong> {JSON.stringify(txn.node.tags)}</p>}
                  <p><strong>Link:</strong> <a href={`https://viewblock.io/arweave/tx/${txn.node.id}`} target="_blank">{`https://viewblock.io/arweave/tx/${txn.node.id}`}</a></p>
                </div>
              )
            })}
          </div>)
        )}

        {ownersTxns && (
          <div>
            <h3>Owner Transactions</h3>
            {ownersTxns.map(txn => {
              return (
                <div style={txnStyle}>
                  <p><strong>Amount:</strong> {txn.node.quantity.ar} $AR</p>
                  <p><strong>Fee:</strong> {txn.node.fee.ar} $AR</p>
                  {!!txn.node.tags.length && <p><strong>Tags:</strong> {JSON.stringify(txn.node.tags).split(",").join('\n')}</p>}
                  <p><strong>Link:</strong> <a href={`https://viewblock.io/arweave/tx/${txn.node.id}`} target="_blank">{`https://viewblock.io/arweave/tx/${txn.node.id}`}</a></p>
                </div>
              )
            })}
          </div>)
        }
      </div>
    </div>
  )
}

export default App

const containerStyle = { display: "flex", gap: "8rem", justifyContent: "center", maxHeight: "80vh", overflow: "scroll" }
const txnStyle = { maxWidth: "30vw", textAlign: "left", padding: "10px", border: "1px solid black", marginBottom: "15px", overflow: "scroll" }
Connecting to Arweave gateway
At this point, we can start our server by opening the terminal and running yarn start. Once the UI is displaying, you'll see a connect button. Once that is clicked and permitted, an Arweave object is instantiated and assigned to the variable arweave. The instance can point to either a node or a gateway.
const arweave = Arweave.init({
    host: 'arweave.net',
    port: 443,
    protocol: 'https'
  });
We set the values inside of the init function call to specify what node or gateway we want to connect to. For this build we are interacting with the arweave.net gateway (mainnet). We will use this instance later when we need to query our wallet transaction data.
Writing the functions
We need to create 3 functions. One is connecting to ArConnect in our browser, and specifying the permissions we will need to get all of our addresses back. One handles setting state of the chosen wallet address to query. The last function will handle queries to retrieve transaction data from the selected wallet.
const connect = async () => {
    setIsLoading(true);
    try {
      await window.arweaveWallet.connect("ACCESS_ALL_ADDRESSES");
    }
    catch (error) {
      setError(`${error.message}. Refresh to try again.`);
    }
    const addresses = await window.arweaveWallet.getAllAddresses();
    setWallets(addresses);
    setIsLoading(false);
  }
After clicking the connect button we are prompted by the browser extension to enter our password and allow permissions to access all addresses, which is triggered by await window.arweaveWallet.connect("ACCESS_ALL_ADDRESSES"). Once that has been authorized, we call getAllAddresses to retrieve all of wallet addresses we have loaded. setWallets then updates the state of wallets as an array of strings, our wallet addresses.
Once retrieved the select options in the UI will populate with the wallet addresses, allowing us to choose through our wallets and retrieve the transaction data.

const handleChange = async (e) => {
  const address = e.target.value;
  setCurrentAddress(address);
}
This function is the onChange event listener for our select element, updating the value of currentAddress to reflect the choice of wallet we want to query.
Querying Arweave
This is where we need to use GraphQL to retrieve our information. Before explaining how the handleQuery function below works, we should look at the GraphQL queries we use for this build. recipientsQuery is for all incoming transations to that wallet, ownersQuery being for outgoing.
I recommend you check out the Arweave/GraphQL Guide and use the Arweave/GraphQL playground to copy these queries, one at a time, replacing the address with your own. You will need to copy it from the second query to the closing brace.
Click to view code
export const recipientQuery = (address) => {
  const recipientsQuery = {
    query: `
    query {
      transactions(recipients: ["${address}"]) {
        edges {
          node {
            id
            owner {
              address
            }
            fee {
              ar
            }
            quantity {
              ar
            }
            tags {
              name
              value
            }
          }
        }
      }
    }
`}
  return recipientsQuery;
}

export const ownersQuery = (address) => {
  const ownersQuery = {
    query: `
    query {
      transactions(owners: ["${address}"]) {
        edges {
          node {
            id
            recipient
            owner {
              address
            }
            fee {
              ar
            }
            quantity {
              ar
            }
            tags {
              name
              value
            }
          }
        }
      }
    }
`}
  return ownersQuery;
}
These queries request transaction information from the Arweave network, explicitly pointing to the address we chose from the options. Here we are requesting certain pieces of nodes from the transaction. These nodes are returned in the edges object of our query. A graph is a network, a node is a vertices of that graph and an edge is one of the links between these nodes. The attributes in the node object is the data we want returned. You can add and/or remove depending on the required data needed. More on Arweave data and query structures here.

If we take a look at the recipientsQuery we see that there are a few attributes we are requesting from the node that stores information for that particular transaction.
id: Transaction ID.
owner { address }: Transaction owners address.
fee { ar }: Transaction fee in $AR.
quantity { ar }: Quantity of $AR received, if any.
tags { name, value }: Transaction tags (App-Name, Content-Type, etc).
The address value in the query is coming from our onChange handler for the wallet options. Once the get txn buttons are clicked the queries are executed, passing currentAddress as the recipient (incoming) or owner (outgoing).
const handleQuery = async (condition) => {
    setIsLoading(true);
    const isRecipient = condition === "recipient";
    const queryFunc = isRecipient ? recipientQuery : ownersQuery;
    setOwnersTxns();
    setRecipientTxns();
    try {
      const query = queryFunc(currentAddress);
      const results = await arweave.api.post(`graphql`, query)
        .catch(err => {
          console.error('GraphQL query failed');
          throw new Error(err)
        });

      const edges = results.data.data.transactions.edges;
      isRecipient ? setRecipientTxns(edges) : setOwnersTxns(edges);
      setIsLoading(false)
    }
    catch (error) {
      console.log(error);
    }
  }
The parameter of handleQuery is the conditions passed in from the function call on the button onClick. They pass in a string to indicate which query to use for the POST API call.
 <button onClick={() => handleQuery("recipient")}>get incoming txns</button>
 <button onClick={() => handleQuery("owners")}>get outgoing txns</button>
After setting the loading state, the function then takes the condition argument and checks if it is a recipient or owner so we can then declare which query function to use. Then it clears the current state of both owner and recipient transactions followed by creating a query variable, set to the value of the query function passing in currentAddress. This will return one of the GraphQL queries we viewed earlier.
The next piece of executed code is the API call to the network, await arweave.api.post('graphql', query), returning an object containing headers, config, status, edges and nodes. Once this is returned we set the edges variable to equal our requested data, and then set it to either setRecipientTxns or setOwnersTxns depending on which button we clicked.
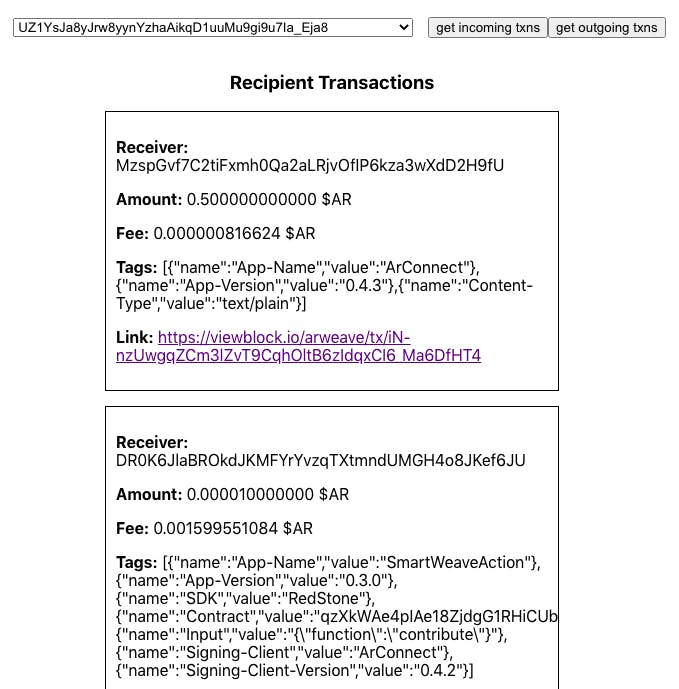
Once we have received the data from the API call and set the state, conditionals in the UI are triggered to display each transaction, incoming and out. This happens by mapping over our recipientTxns or ownersTxns nodes and calling the data inside of our elements.
{ownersTxns.map(txn => {
  return (
    <div style={txnStyle}>
      <p><strong>Receiver:</strong> {txn.node.recipient}</p>
      <p><strong>Amount:</strong> {txn.node.quantity.ar} $AR</p>
      <p><strong>Fee:</strong> {txn.node.fee.ar} $AR</p>
      {!!txn.node.tags.length && <p><strong>Tags:</strong>{JSON.stringify(txn.node.tags).split(",").join('\n')}</p>}
     <p><strong>Link:</strong> <a href={`https://viewblock.io/arweave/tx/${txn.node.id}`} target="_blank">{`https://viewblock.io/arweave/tx/${txn.node.id}`}</a></p>
   </div>)
})}
Smartweave
After only slightly scratching the surface of what we can do using Arweave and GraphQL, we can build more complex dApps by using (SmartWeave), which is smart contracts for the Arweave network. These contracts are currently supported by JavaScript, Solidity, Rust and C.
For example, Permapages uses GraphQL to create and query Smartweave contracts. Permapages allows us to create and manage our own permanent web3 profile and Permaweb pages built on Arweave and the ability to register ArNS subdomain's. With user-friendly naming schemes for tags we are able fetch from the smart contracts using tags in the queries. You can see a working example of that here.
You can see what registered subdomain contract looks like here, which is the contract registering the subdomain for an introduction into D_D School of Code. If you take the name value from that response and prepend it with a period to arweave.dev you can view the Permapage: ddschoolofcode.arweave.dev

Conclusion
With the Arweave ecosystem growing rapidly, more compatible tools are being built and introduced to us. This gives developers freedom to be innovative when building decentralized applications using these technologies. From decentralized social media to email, the composable uses for developers continue to appear and enforce Arweave's position in the blockchain industry.
I hope this walkthrough gives you enough to explore those uses!
Github: github.com/PBillingsby/arweave-graphql-arco..
Thanks to
The Arweave community
Rakis @ Permapages
Ropats16
Developer DAO